This is the fifth post in my Family History Binder series. Click here to go back to part 1.

The first page of each ancestor section contains a timeline of the person’s life along with a map showing the locations they lived. I put this sheet inside the Avery Clear Pocket Label Dividers for each individual.
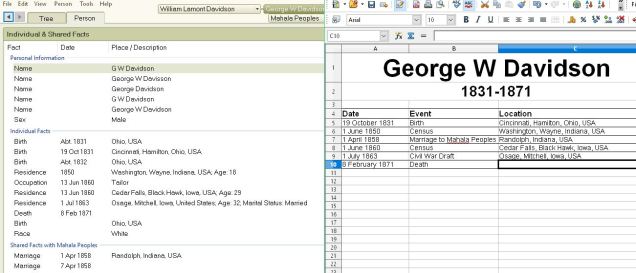
I use Family Tree Maker (FTM) to keep track of my research. As I input each fact into FTM, they are automatically put in chronological order. I then opened a spreadsheet and with the two programs side-by-side I was able to quickly type the information to create a timeline.
I also used Family Tree Maker to create the map. After clicking on the “places” tab (#1 in image below), I then changed the dropdown “list by” menu on the left to “person” (#2) and then selected the individual from the list (#3).
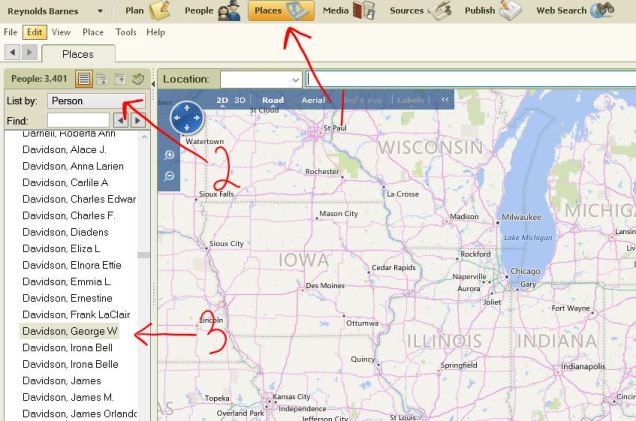
On the right side, I then checked the boxes (#4) next to the facts that I wanted to include in my map. This will only work if your locations are in the correct format. Then I zoomed (#5) so that the route was centered on the screen. You can then use the snipping tool on your computer to copy the map on the screen, but I found that clicking the “print” button (#6) and then printing as a pdf resulted in a cleaner look.

One of my individuals moved a few times in Kansas and then moved to Arizona and lived in a few different locations there. To show more detail, I decided to split it into two separate maps and used both.

Once I had my maps, all I did was copy and paste them to the bottom of my timeline spreadsheet.
On the back of my timeline, I inserted a family group sheet. This gives me a list of all of the children of the individual. I again used Family Tree Maker to create mine, but here are a couple other options as well:
Blank Family Group Record with LDS Ordinances
Click here to go on to the next section about how I arranged the documents and sources for each individual.
